Showing posts with label side dish. Show all posts

Tuesday, March 30, 2010

Easter Eggs in a Nest

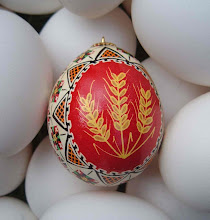
Once you've decorated some Easter eggs (see the next post, on instructions for decorating Ukrainian Easter Eggs,  here), you can bake them in a ring of dough to give them their own little nest.

The decorating needs to be done while the eggs are RAW, because you're going to bake them in the dough, and they will otherwise be overdone.  As it is, they will be perfectly "boiled" eggs, but they will have been baked, not boiled.

EASTER EGG BREAD

3 1/2 to 4 cups all purpose flour
1 tsp salt
1/4 cup sugar
1 pkg yeast
1/4 cup canola oil
1 egg
grated zest of 1 lemon optional
water necessary to pull together the dough


I use a food processor, dump in the ingredients, add water as necessary for the dough to form a ball, knead for 45 seconds, remove and let rise in an oiled bowl. 

Let the dough rise, punch down, and let rise again.

It's very advisable for your raw eggs to be decorated already before you make the dough.  Life intervenes, and the dough won't wait for you to decorate eggs, but the decorated eggs can wait for the dough.  It's probably best not to refrigerate the eggs while the dough rises, as the condensation when the eggs come back out of the fridge could make the dyes run - but it's up to you.

When it's ready to make the nests, divide the dough into 10-12 balls. Punch a hole in the dough and enlarge it to form a bagel shape.  You could also make a dough snake and join the ends, but that didn't work very well for me.  The rich dough didn't want to join well, and I had a thin spot on one side and the eggs wanted to fall out of the nest.  not good. 

Place the nest on parchment paper on a pan (or a well-oiled or cornmealed pan), and place the egg into the nest.  It should be sitting up out of the nest about half way.

Preheat the oven to 375 while the dough is rising (for about 20-30 minutes).  Brush the nest with an egg wash of one egg mixed with a few drops of water, and add sprinkles if you'd like.

Bake for 15 minutes.  The egg, as you can see, will be perfectly done. (The interior of the yolk was a little underdone.  It could have used another minute or two.) If prepared ahead the nests need to be refrigerated. 


Saturday, February 27, 2010

Spaghetti with breadcrumbs and mushrooms


This is as good as it gets.  I like this a lot as just spaghetti with breadcrumbs, but it pairs nicely with mushrooms, asparagus, cauliflower - you name it.

I first saw this on a Lidia Bastianich episode, without any vegetable.  It's a wonderful side dish, but I also like it for a light meal or snack - essentially the equivalent of a slice of toast with butter.  The critical element is good breadcrumbs, so use some decent bread to make fresh crumbs - or use panko (Japanese bread crumbs, now available everywhere) if you don't have bread on hand.

SPAGHETTI WITH BREADCRUMBS

Cook spaghetti according to directions

For each serving, use 1/2 - 1 slice of bread, turned into crumbs in the processor or blender.

Melt butter in your saute pan - about a half Tablespoon per slice of bread.  Add a little olive or canola oil if you feel you need more oil - but butter adds essential flavor.

Add some minced garlic - (or a little garlic powder).  You'll need to experiment to see what you like.  I use 1/2 clove garlic for a slice of bread.

Add your crumbs to the garlicky oil and saute until the crumbs are lightly browned, and crisp.
Add a Tablespoon or so of grated parmesan cheese just as you're removing from heat, if you'd like
Salt and black pepper to taste.
Stir in the well drained spaghetti.

To add the optional mushrooms, saute slices in butter until golden brown. Add salt and black pepper to taste.

Tuesday, February 16, 2010

Simple Pilaf


This is a very simple rice dish I can throw together with ingredients I almost always have on hand; in fact, it's basically as quick as using a boxed rice pilaf, but with more control of the ingredients, and it costs less.

I use a vegetarian chicken-flavored broth powder from the bulk section of City Market in Burlington, but you could use chicken bouilion or broth, or some combination.  The addition of a little curry powder heightens the flavor without giving it a noticeable curry flavor. I use dried minced onion just for convenience and speed, but you could certainly saute minced onions, and I do that when I want more onion than I put in this dish. Add garlic, fresh ginger, red pepper flakes if you want.  Or herbs - especially parsley and thyme. But it's not necessary for a basic pilaf.

I always have frozen petite green peas on hand to add to salads or rice dishes.  They only need to be thawed in the dish itself at the end of cooking.  For more onion and a little green I've used minced onion tops that I always have in the winter.

I usually add golden raisins to my curries or pilafs, but used craisins instead and liked them a lot.  I use short grain rice lately, but use the rice you want and adjust the water accordingly (long-grain converted generally takes 2 1/2 times as much water as rice, instead of 2 to 1)

I think sour cream is a separate food group, and so of course I look to use it where I can.

SIMPLE PILAF

2 cups water
1/4 cup vegetable broth powder, or can of chicken broth instead of equivalent water
2 Tablespoons dried minced onion
1/4 teaspoon curry powder
salt and pepper to taste (the broth powder does not have salt)

Bring to a boil and add
1 cup short grain rice

Stir a couple of times, adjust the heat to very low, and barely simmer until all the water is absorbed (generally 20-25 minutes or so).  Stir in frozen green peas.  Add minced onion tops or scallions.  Top with raisins or craisins, and optional sour cream, yogurt, or cottage cheese.