Tuesday, April 27, 2010

Spring snow


Yesterday this tulip had her petals wide open to receive the Spring sun, and this morning she thought better of it.

APRIL is the cruellest month, breeding
Lilacs out of the dead land, mixing
Memory and desire, stirring
Dull roots with spring rain.
Winter kept us warm, covering     
Earth in forgetful snow, feeding
A little life with dried tubers.

                                                                                             T.S. Eliot                                                                                     

Compost Delivery


This was the day I got my delivery of  topsoil from Champlain Valley Compost.  We could have chosen better weather, as it's practically snowing snowballs. The truck had it easy here, but slipped quite a bit making a side delivery on a slope.

I hadn't realized that topsoil is a composed substance nowadays, rather than scraped from somebody's field. Steve Wisbaum mixes weed-free screened high quality silt with the compost to make what he calls "topsoil plus," 65% compost and 35% silt.   The silt will help my poor sand, raising its trace elements a little and helping it retain water, making it an even better choice for my garden than compost.  The silt/compost mix can be used as potting soil, or a soil for raised beds. I'm going to mix it with some commercial peat based potting soil I have on hand, for my transplants.

A couple of other gardeners in the community gardens got plain compost.  The compost is exceptional, made entirely from horse and cow manure.

I hadn't heard of Champlain Valley Compost before, because they don't advertise (don't need to. There's a clue there).  If you live in Chittenden or Addison Counties check out the web site, and trust me that this is superior to some of the well-know but Not To Be Named composts in the area.

What are those tiny seedlings? Part I

Wondering what those plants are that have sprouted in the garden?

The picture above shows spinach as it has just sprouted. The little seedling to the right of the left hand spinach looks a lot like a beet, but it's the seed leaves of a related plant called variously lamb's quarters or pig weed (chenopodium album) which is my first harvest after the volunteer mustard.  The little plant with the round lobes below the spinach is ragweed (and there's another tinier seedling with yellow-green round leaves, which is also a weed)  It looks a little bit like a lettuce seedling right now.  One of the ways to tell the difference is to look around and see if the seedling appears in the path, in other plots and the path.  Then you can assume it's probably a weed.


These are the seed leaves of radishes, but this is also what any of the coles (cabbage family. think coleslaw) would look like.  So if you've planted broccoli from seed, or kale, or bok choi, cauliflower, brussels sprouts or mustards, this is also what the seed leaves would look like.  The seed leaves are also called cotyledons, and they generally do not look like the "true leaves" that come next and grow and nourish the plant.  These two seed leaves were part of the seed itself, ready to unfurl when it sprouted. This is easiest to see in a bean, which easily splits apart into the two cotyledons.

Friday, April 23, 2010

Growing Dill, Thinking of Pickles


Buying dill seed is something you'll probably only have to do once, since it's a very efficient self-sower and you can save seeds from the seed heads, too.  I grow dill in a band one foot wide, 25 feet long, as a fence on one side of my plot.  If I just let it self sow I end up doing some transplanting, which isn't ideal because of the tap root that the dill sends down.  So with last year's saved seed I've planted 2 parallel rows about 8 inches apart (they would actually like more space than this) and I'll eventually thin the plants in the row to about 6-8 inches.  Before then I'll have lots of thinnings do use as dill weed.

As is true with any plant that reliably self-sows, it's very resistant to frost in the spring, so you can plant it now without much concern (there are already planted seeds in the soil after all, dropped from last year's seed heads).  If your interest is primarily the dill weed instead of the seeds, plan on sowing it at least a couple of times during the summer so you always have a fresh supply.  After the plant flowers the fronds deteriorate or even dry up.  There are dwarf varieties and varieties best suited to the greens, but you'll probably have to plan ahead and find them in catalogs. Look in Johnny's Seeds.

Dill goes well with salmon of course, but my favorite summer use for the green dill is in a dish of rice, summer squash or zucchini, onions, black pepper, and dill. Topped with sour cream. *sigh*  Will post something like a recipe when the zucchini comes in.

I also use the seed heads in half sour fermented pickles (recipe will follow soon).  The picture above shows the interior of a gallon jar with garlic, a little pickling spice, and a dill seed head, before I've added the cukes and brine.  The great thing about growing your own is that you can pick the seeds at just the right point for pickling, which in my view is while the seeds are mature but still green.  The picture below shows dew on a patch of dill.  Morning in the garden doesn't get much lovelier than that.

Tuesday, April 20, 2010

How to Plant Peas


Time to plant peas, which need cool weather.  Here in Vermont we sometimes don't get a real springtime.  The saw is that we go from mud season to summer, and it's not unheard of to have 90 degree weather in May.  So the best peas will be started just about as soon as the soil can be worked.  June 1st is about the last possible date for spring peas, and I think it's an iffy last date.  Growing up we planted the whole garden memorial day weekend (which was the 31st way back then) but our growing season is a few weeks longer in the spring than it used to be.

If you're going to grow peas that need support it's good to plan ahead. I grow my tall peas on chicken wire, or sometimes just parallel strings, but in either case I dig holes for wooden plant stakes before I plant the row, so they're ready to add the fence (but you could pound them in later).  If your peas could use a little support you can add "pea brush" after you've planted.  Just take brush and push into the soil and the peas will cling to the branches. I wouldn't do that for any peas that grew taler than 30 inches.

Peas don't need a lot of fertilizer, even in my barren sandy soil, because - like all legumes - they have a symbiotic relationship with bacteria that fix nitrogen to the roots.  These bacteria pull nitrogen from the air and concentrate it in nodules on the roots, making it available to the plants (you can buy an innoculant for your peas and beans to make sure this happens.  I don't).  But I always put a light sprinkling of fertilizer on the surface of the soil and work it in with a cultivator.  Too much fertilizer can rot the pea seeds, so you can instead add fertilizer after the peas are up, if you feel you need it. 

The directions on the back of my packets of Johnny's pea seed varieties say to sow in a band 3 inches wide, with the individual seeds 1 - 1 1/2 inches apart, with no need to thin.  My bands are maybe just a little wider.  I do see some folks growing pea seeds in a single straight row, and that's really not necessary.  The productivity from this row will be much higher, and it makes optimal use of the space.  I vary from this only when I grow short peas that don't need any kind of support, and then I grow three single rows separated by about 8 inches, and the peas when they grow will tangle up and support each other.

I used to sow the seeds at the bottom of a little trench, cover them with 1/2-1 inch of soil, and firm the soil.  My friend JP had much better and more even germination than I did, so I now use his method of preparing the row, sowing, and then pushing each seed into the soil to just above my first knuckle (the four holes in the picture above).  This sounds like a lot of work, and if I were planting more than I do it would be impractical. But it doesn't take that long, and only needs to be done once.  I do this for about 100ft of peas, but not all of them are planted at the same time.  Different varieties and different planting dates give me peas over a long season.

After the seeds are pushed down I brush a little soil over to cover the holes, and gently firm with my hand.

Gardening in Sandy Soil


It rained most of the weekend, and the picture above shows the soil on Monday.  It is never, never, too wet.  Before long there will be hot afternoons when the surface temperature is 120 degrees.

Gardening in sandy soil has some real benefits, and some significant challenges.  We can start the garden much earlier than those around us who have heavy soil.  It's ridiculously easy to work with, and weeds pull out very easily (pull them when the soil is dry, and the roots don't have a good hold.  Then water to help the disturbed roots of your garden plants).  In very wet seasons it's an advantage to have such good drainage, and if water is available we have the ideal situation of being able to control just how much water the plants get.  It's too dry for slugs.

On the other hand:

This soil is so sandy it doesn't hold fertility, and fertilizer of some sort needs to be added every year. Adding organic matter is critically important, both to improve the baseline fertility, but also because the higher the organic content the better the soil will hold on to water and any fertilizer that's added.  The biggest mistake most gardeners make in the community gardens is not adding enough fertilizer at planting time, and then not side-dressing with more fertilizer during the growing season.  There is bagged organic fertilizer available, and I also use some 5-10-10 (more on this another time) because it's so much cheaper and I need so much.  alas. 

The soil is so dry and so devoid of organic matter there is not the vibrant microbial life that supports healthy plant growth, and makes nutrients available, making even more fertilizer necessary.  No earthworm will make its home in the hot, dry, sandy soil.  When I've brought earthworms in as part of a pile of horse manure, they stay only as long as there's a moist pile of manure and straw.  As soon as the manure is distributed they go deep and/or leave.  Adding leaves, compost, manure, coffee grounds, peat - just about any organic matter you can get, is critically important.  A compost pile of your own is useful, but it's also a great idea to let the weeds you've pulled just stay in place and add back that organic matter.  If you want a neater looking garden, then dig a little hole in the path, throw your weeds in, and then cover.  Over the years some people have added significant amounts of organic matter to their plots in the community garden, and it's possible to pick out those plots because the soil has become darker and richer.

The surface dries out so quickly it's good to water small seeds planted in shallow drills frequently until they germinate.  Carrots tend to germinate poorly in the sandy soil, (even though the soil won't crust over, which is an advantage).  But it can take as much as 3 weeks for carrots to germinate, and in that time they need to have some moisture available.

Many of you will either have read that some things should be planted in raised beds or hills, or have done that in other gardens. The only reason to do that in sandy soil is to increase the depth of fertile soil, if that's an issue.  But hills and raised rows can require more water.  Water tends to run off the mound.  A principal reason cucumbers are grown in hills is so they won't have "wet feet" from sitting in moist soil.  That is never a problem for us.  In fact, I grow most of my transplants in bowls, rather than hills, so they will collect and hold water.   The only other reason to plant in raised beds is they will keep you from walking close to the plants.  It's very important to avoid compressing the soil near your plants, so the roots have a nice loose soil to explore.  After I've prepared a row but before I plant, I loosen the soil adjacent to the row by inserting my shovel and lifting the soil, as I've done in the picture below (the path on the right is compressed.  The stake marks where the row will be planted, to the left of the string).

It's better to water deeply less often, than to give a light watering frequently.  Roots will tend to grow where the water is, and you want deep roots.  If there's plenty of moisture at the surface the roots will stay near the surface, making the plants more susceptible to heat and dry spells when you might not be able to water.

Sunday, April 11, 2010

Under Lights


The lights needed for growing vegetable starts are simple and inexpensive.  To start my tomato, pepper, and cole plants I use 3 sets of 4 foot flourescent shop lights side by side.  Under those lights I've started 100 each of tomatoes and peppers, and three dozen broccoli/cabbage plants.  I admit that by the middle of April I'm usually taking the plants outside for part or all of the day, and sometimes in early May when it's colder and rainier than I had planned on it being (meaning I didn't plan!) I've had to platoon them, growing half under lights during the night and putting them in a totally dark room during the day, and then the other half under the lights all day, and in the dark room at night.  As long as they spend time in total darkness they won't get leggy, even if they have to spend a couple of days there continuously.

The real key is to have the lights be no more than 3-4 inches above the seedlings.  To accomplish this I raise the lights gradually as the plants grow.  Here comes the part where you should not do what I do:  I rest the ends of the fixtures on books (an old set of encyclopedias), and this means that with some of the brands of fixtures the bulbs themselves rest on the books.  This can't be a good thing.  They never get hot, but I'm still not sure it's safe (informed opinions about this would be welcome in comments), and it would be better to have an arrangement where the lights could be lowered and raised by chains, as the fixture always comes with holes for an S hook to hold the chain.  Some brands of fixtures are designed such that the metal shade extends below the lights, and these are the ones to look for if you're going out to buy them.

The light stands that are sold by gardening centers do generally have a way to lower the lights by chains, but they are very expensive.  At best, you could build a modest arrangement to do this yourself.  Make sure you can put at least two units side by side, as I find that there's not enough light to satisfy plants off to the side.  If you're planning on putting flats under the lights you'll definitely need two-or three sets side by side.   As a temporary arrangement planks or 2x4's straddling workhorses, with hooks that would let you attach the fixtures' chains, might possibly be safer than my arrangement.  No matter what you do, make sure that neither children nor pets can upset the lights.

Fortunately I have a 6 foot table in a back room that I can dedicate to this project, so I'm not getting down on the floor to water little seedlings.  I drape the table with 6 mil plastic, and I'm all set to go.

This picture shows the dilemma I face with just these 3 sets of lights.  I have tiny seedlings 3 inches under the lights, and tomatoes that are growing right up into the lights.  It's time to transplant the tomatoes, and I'll need to raise the flat of tiny seedlings so they're closer to the lights.  The tomatoes are a little leggy.  That's mostly because there have been days I've never turned on the lights at all (sigh), and also because I should have bought new bulbs this season, and didn't.  Even though the lights still turn on, they lose brightness over time, and should be replaced every year.  But the tomatoes will be fine when transplanted, and the camera angle is also exaggerating how tall they are.  They tiny seedlings look okay, as you can see. (And yes, the tomatoes are a little yellower than they should be. need fertilizer)

Saturday, April 10, 2010

DAILY GARDEN UPDATE

Some of this information is available in more detail under garden posts.  To see all garden posts in chronological order, click on "All garden posts" under gardening information..  You can also look up by subject or by some vegetables.
Check out the website "Weekend Gardener", linked here or under Food Sources, for what you can plant this week.  I use May 15 and October 15 for last and first frost dates.

May 20.  Well I didn't get my peppers planted, but did plant about 60 mixed coles - broccoli, romanesco cauliflower, 3 kinds of cabbage, 2 kinds of bok choi, and chinese cabbage.  I'll give the peppers another go today.


May 18. I'm going to plant my peppers tomorrow.  After then it's supposed to be above 50 at night for the next ten days, and it will be getting warmer during the day.  They need to be transplanted, and I'd rather do it once rather than twice with all I have to do.  Will wait on the tomatoes because they don't need to be transplanted yet.


May 16. Planted beans, but won't water them unless it gets very dry.  Three parallel rows about 10 inches apart, beans 2-3 inches apart, about an inch deep. Fresh Pick, Brittle Wax, Royal Burgundy, and Roma II.  Planted 12 feet (times 3), so altogether about 36 feet of beans.

May 16:  Well I planned a lot of planting yesterday, but I broke my next to little toe at 7:30am, bringing plants out of the house.  sigh.  I'm hobbling around, and will get some stuff done today, but not as much or as fast as I intended.  Someone else is having to help JP put the water in, alas, but at least we will now have water on tap, which is a great luxury.

May 15.  I said above that I use May 15 as our last frost date, and at the moment it appears we may be frost free from now on.  none in the forecast for the next 10 days.  Planning a lot of planting and transplanting today, as we'll get the water in tomorrow.

May 14.  We got a little rain last night.  I planted some of my cucumber seeds yesterday anticipating that.  Have dug and filled holes for all cukes, melons, squash and tomatoes.  Finally found my super sugar snap pea seeds and planted this evening, 2-3 weeks later than optimal.

May 8 Went looking for pots of curled parsley yesterday, the kind that come with about 30 plants in a little pot.  Have had very good luck transplanting all the little plants into cups and then to the garden a few weeks later.  But there were only pots with 4 or 5 plants, and I was too cheap to buy them.  So now I need to start parsley seeds, which means soaking them first in warm water for 24-48 hours.  They will still take 2-3 weeks to germinate.  


May 8 Um, not gardening outside in this cold, rainy, weather, though I could still dig some more holes.  Colder weather coming, so I'm not going to plant new things.  I'm going to cut the bottoms off some gallon water jugs I've saved, and use them as hot caps over the squash seeds I planted, both day and night.  Will start cukes in paper towels today.


May 5.  Have been digging the holes for tomatoes, though I won't transplant them for a couple of weeks.  I've filled each hole with a half gallon of compost, a handful of 5-10-10, a handful of Gardener's Supply Company organic flower fertilizer 5-7-4, a small handful of pelleted dolomitic limestone, and a small handful of kelp.  I'll mix it all together well and be ready to put in the plants.


May 2.  Finally got tomatoes transplanted on Saturday, the 30th. They're doing well, but they should have been transplanted 10 days ago.  On the other hand, they spent 2 days inside without light, so I'm glad they weren't transplanted.  87 today.  Planted onions April 30 and yesterday.  Separate post and pictures to follow soon.
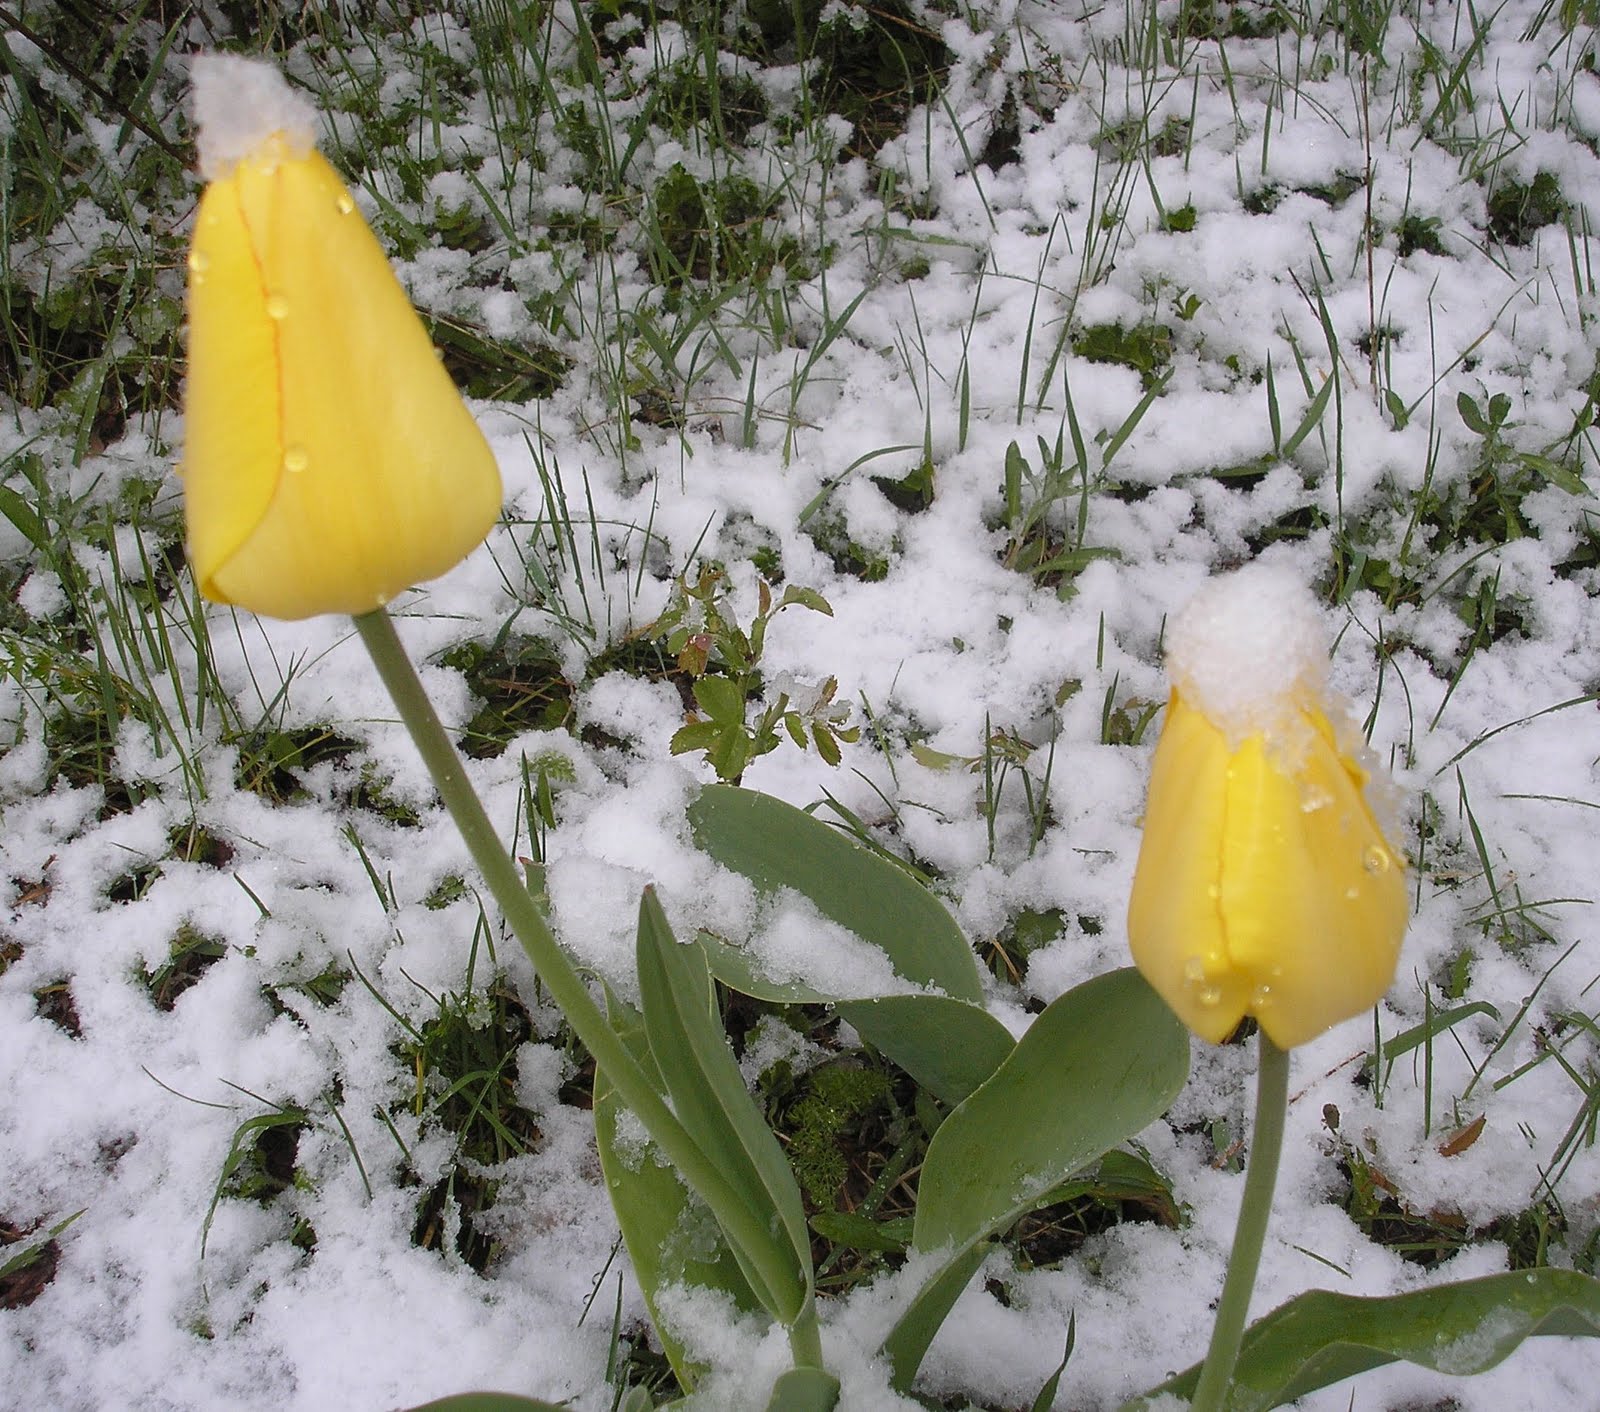

April 27 Boy, am I glad I waited to transplant.   3:00pm and it's still 34 degrees.  Real snow, falling in snowball size clumps.  But the topsoil was delivered, and it's supposed to be in the 70's this weekend.

April 26. Still haven't transplanted the seedlings.  I'm now waiting for the delivery of a load of topsoil (silt and compost) tomorrow, which I can use as potting soil - and I won't need any fertilizer at all for the time being.  Also, winter storm watch for tomorrow and Wednesday (April in Vermont).

April 25. Many of the seeds I planted April 14 are up:  radishes, spinach, some beets and chard, and the peas for shoots.  Have had to water these seedlings a couple of times, as it rained after I planted them but then got very dry.  Have not watered the seedlings that went into dry ground.


April 23.  I never transplanted seedlings on the 21st.  A frost was predicted for last night, and now it's predicted for tonight.  Don't want to have to deal with bringing all those transplants in, so I'm waiting to do it tomorrow.


April 21. Transplanting seedlings today, overdue.  Will plant some more carrots, beets, lettuce, in square foot plots. Update:  Also planted a few onion sets, wild lettuce mix, wild kale mix, corn poppy, california poppy, borage, and marigolds.  Way too early for the marigolds, but it's just 2 little square foot plots, and I can cover if they've germinated before the first frost.

April 20. Nothing planted. Set up some stakes to mark off plots, and gabbed a lot with other gardeners. Got onion sets and one bunch onion plants at Agway (don't get the ones labeled short day. They shouldn't be selling them!) Also got one flat of pansies, to plant in a square foot.

April 19.  Got some peas planted (see post about planting peas).  Started Caseload, which is the best shelling pea I've ever grown, hands down, and snow sweet (I think - I'll look it up again), a variety of snow pea that's new to me.  About 12 feet each.  Got the stakes in, but don't need to get the fence up until they're up and growing.

April 19.  This cold snap is over.  Partly sunny today, and already 42 at 8:00.  Will work on getting some transplanting done today.  The tomatoes under lights are badly in need to transplanting.  Lots of things can go into the garden now.  Will try to get to peas tomorrow, but I need to get some posts in the ground first, to support fences for the peas.

April 16.  Won't get above 45 today, and maybe not above 40 tomorrow, so I have to start platooning under lights. But we are getting some needed rain.

April 15. planted 15" square each of radish, and red-cored chantenay carrots.  This is just the first of many of each that I'll plant in succession (I don't need more than 20 radishes at a time.) We'll get rain tonight, which is good.  The sandy soil is so dry the furrows for the little seeds filled in.

April 14. Planted a few seeds today.  Am growing some modified square-foot garden rows, using the width of the rake (15") to make side by side patches, in a double row.  Planted dwarf grey sugar peas for pea sprouts, bright lights chard and fordhook chard, space spinach, and a little leaf lettuce mix.

April 13. 30 this morning.  Yesterday JP and I got started on marking out the community garden plots with stakes.  I could start getting some posts in and putting in the "sugar ann" sugar snap peas and the sweet peas tomorrow, and that's what I'll aim for.  I always have a lot to do in getting the exterior posts up ready for fencing for the taller peas, so it takes longer to start planting than I'd like.

This afternoon we got the lower gardens staked, and JP got them strung.  Time to garden!

April 12.  34 this morning.  It got up to 61 yesterday.  I planted more peppers yesterday that I'd started in paper towels on April 2.  Later than I usually like to start peppers, but I've got this space problem, so I couldn't have managed everything as early as I'd like.

April 11. 36 again this morning, though 40 was forecast.  It's that time of year not to trust the forecast low. The community garden is being tilled this morning! Looking in Weekend Gardener to see what they say I can plant outdoors now: beets, peas, kale, kohlrabi, mustard greens, onion sets, potatoes, radishes, spinach, turnip.  I'd also plant lettuce outside now, and I wouldn't plant potatoes yet, though they can be planted much earlier than most people around here think.  We will still get some real hard frosts, and the potatoes might rot before they sprout, in the cold soil.


April 10.  36 degrees this morning.  It always seems to happen that about now I run out of space under my bank of three adjacent 4 foot flourescents.  I might start platooning, having some of the plants under lights during the day, and some at night.  The important thing will be to see that they're able to be in the dark when they're not under lights, not just hanging out in the room with ambient daylight.   But for the moment I've put the transplanted tomatoes on the car's back window shelf.

April 9.  JP started his tomatoes today, so it's not too late!  I like to have mine tall enough so the bottom leaves will be well up off the ground, and that means they're tall enough for me to remove the bottom two or three leaves.

April 4 High 72 degrees. Transplanted some eggplants, herbs and flowers from the tiny cells I started them in on March 17.  Eggplant on the upper left,


April 3. Warm! 82 for a high today.  Planted a 98 cell tray with 15 lettuce varieties, and started broccoli, bok choi, and cabbage.  Transplanted early coles and some rhubard and a few tomatoes I started on March 3.  I've found looking back over my garden log the last few years that most things need to be transplanted the first time about a month after the start date.


April 2.  78 degrees today.  Started more peppers and eggplants

March 25.  Have planted most of the seeds I started to germinate in paper towels on March 17.  Very good germination from the Carmen peppers.

March 20.  Aghh!  Things have germinated faster than I thought they would!  Have put them in the fridge to slow them down til I can plant them in the next day or so.

March 17.  Started more peppers and the rest of my tomatoes.

March 9.  First asparagus sprouted, more ace and mariachi, a new girl.

March 8 High 50 today.  Planted sprouted rhubarb, 2 sungold, ace, mariachi and jalapeno.  Surprised the peppers sprouted in 5 days, but they've been in a warm place a couple of feet in front of the register.

March 6.  Onions started in paper towels March 3 have sprouted. 2yr old purple bunching have not started.  I'm counting on enough starting to give me some plants, though this is old for onion seeds.  planted the coles that had started.

March 3:  Started in paper towels:  soloist chinese cabbage, gonzales cabbage, veronica romanesco, a few sun gold, new girl tomatoes, ace, mariach, jalapeno and carmen peppers, onions, asparagus, rhubarb.  Starting in paper towels lets me plant only those that are going to germinate and succeed, and then I don't end up crowding little seedlings.